Ardupilot
Download UAVLAS software and firmware
It is recommended to download the latest version of the ULSTools software. (See download page for details) It is recommended to connect all sensors to PC and update the firmware for all UAVLAS devices in the system. (See ULSTools update page for details)
Autopilot firmware set up
Update autopilot with Arducopter version v4.3.3 or above.
Transmitter Configuration
Configure UAVLAS transmitter See transmitter installation for details
Receiver Configuration
Connect system using UART interface.
Configure UAVLAS receiver See receiver integration section for details
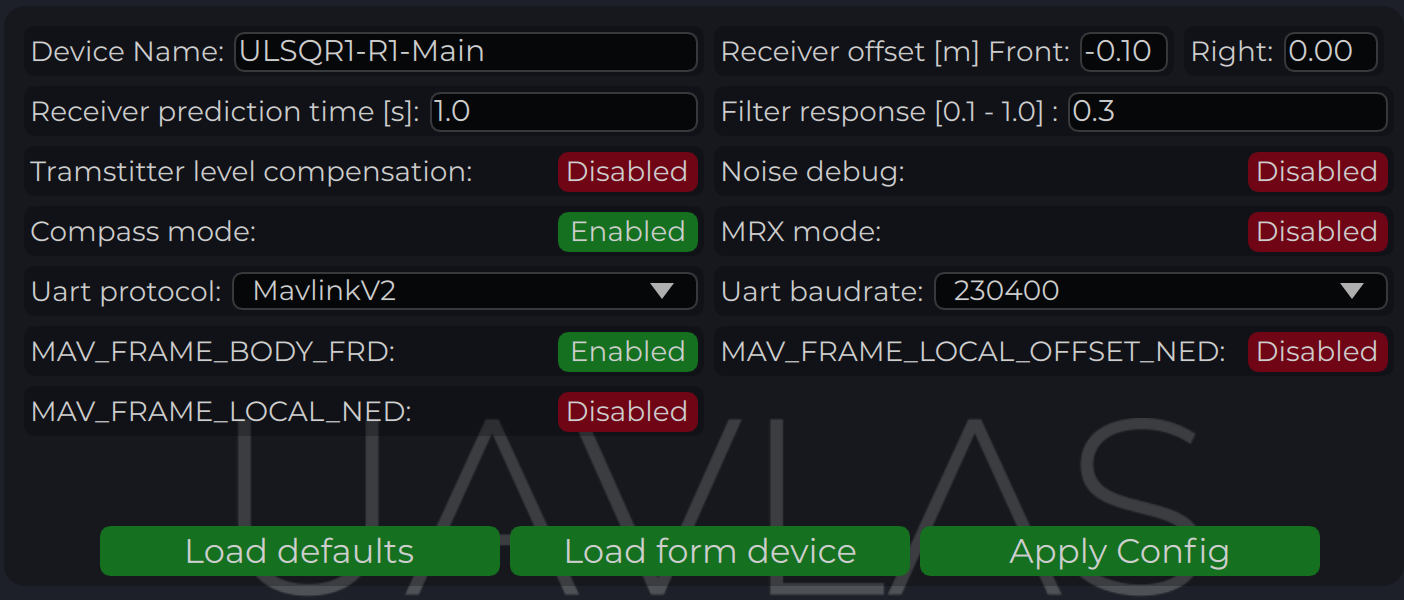
Current version of the system can use MavlinkV2 protocol to communicate with Ardupilot autopilots (for now it supports MAV_FRAME_BODY_FRD).
Example of receiver configuration:
Autopilot configuration
Setup PLND section
| Param | Value | Comment |
|---|---|---|
| PLND_ENABLED | 1 | Enable precision landing module |
| PLND_TYPE | 1 | Use type = 1 to enable UAVLAS sensor over Companion computer driver |
All other parameters in PLND section defaults or use accordingly to your vehicle set up requirements.
On a picture example configuration provided.
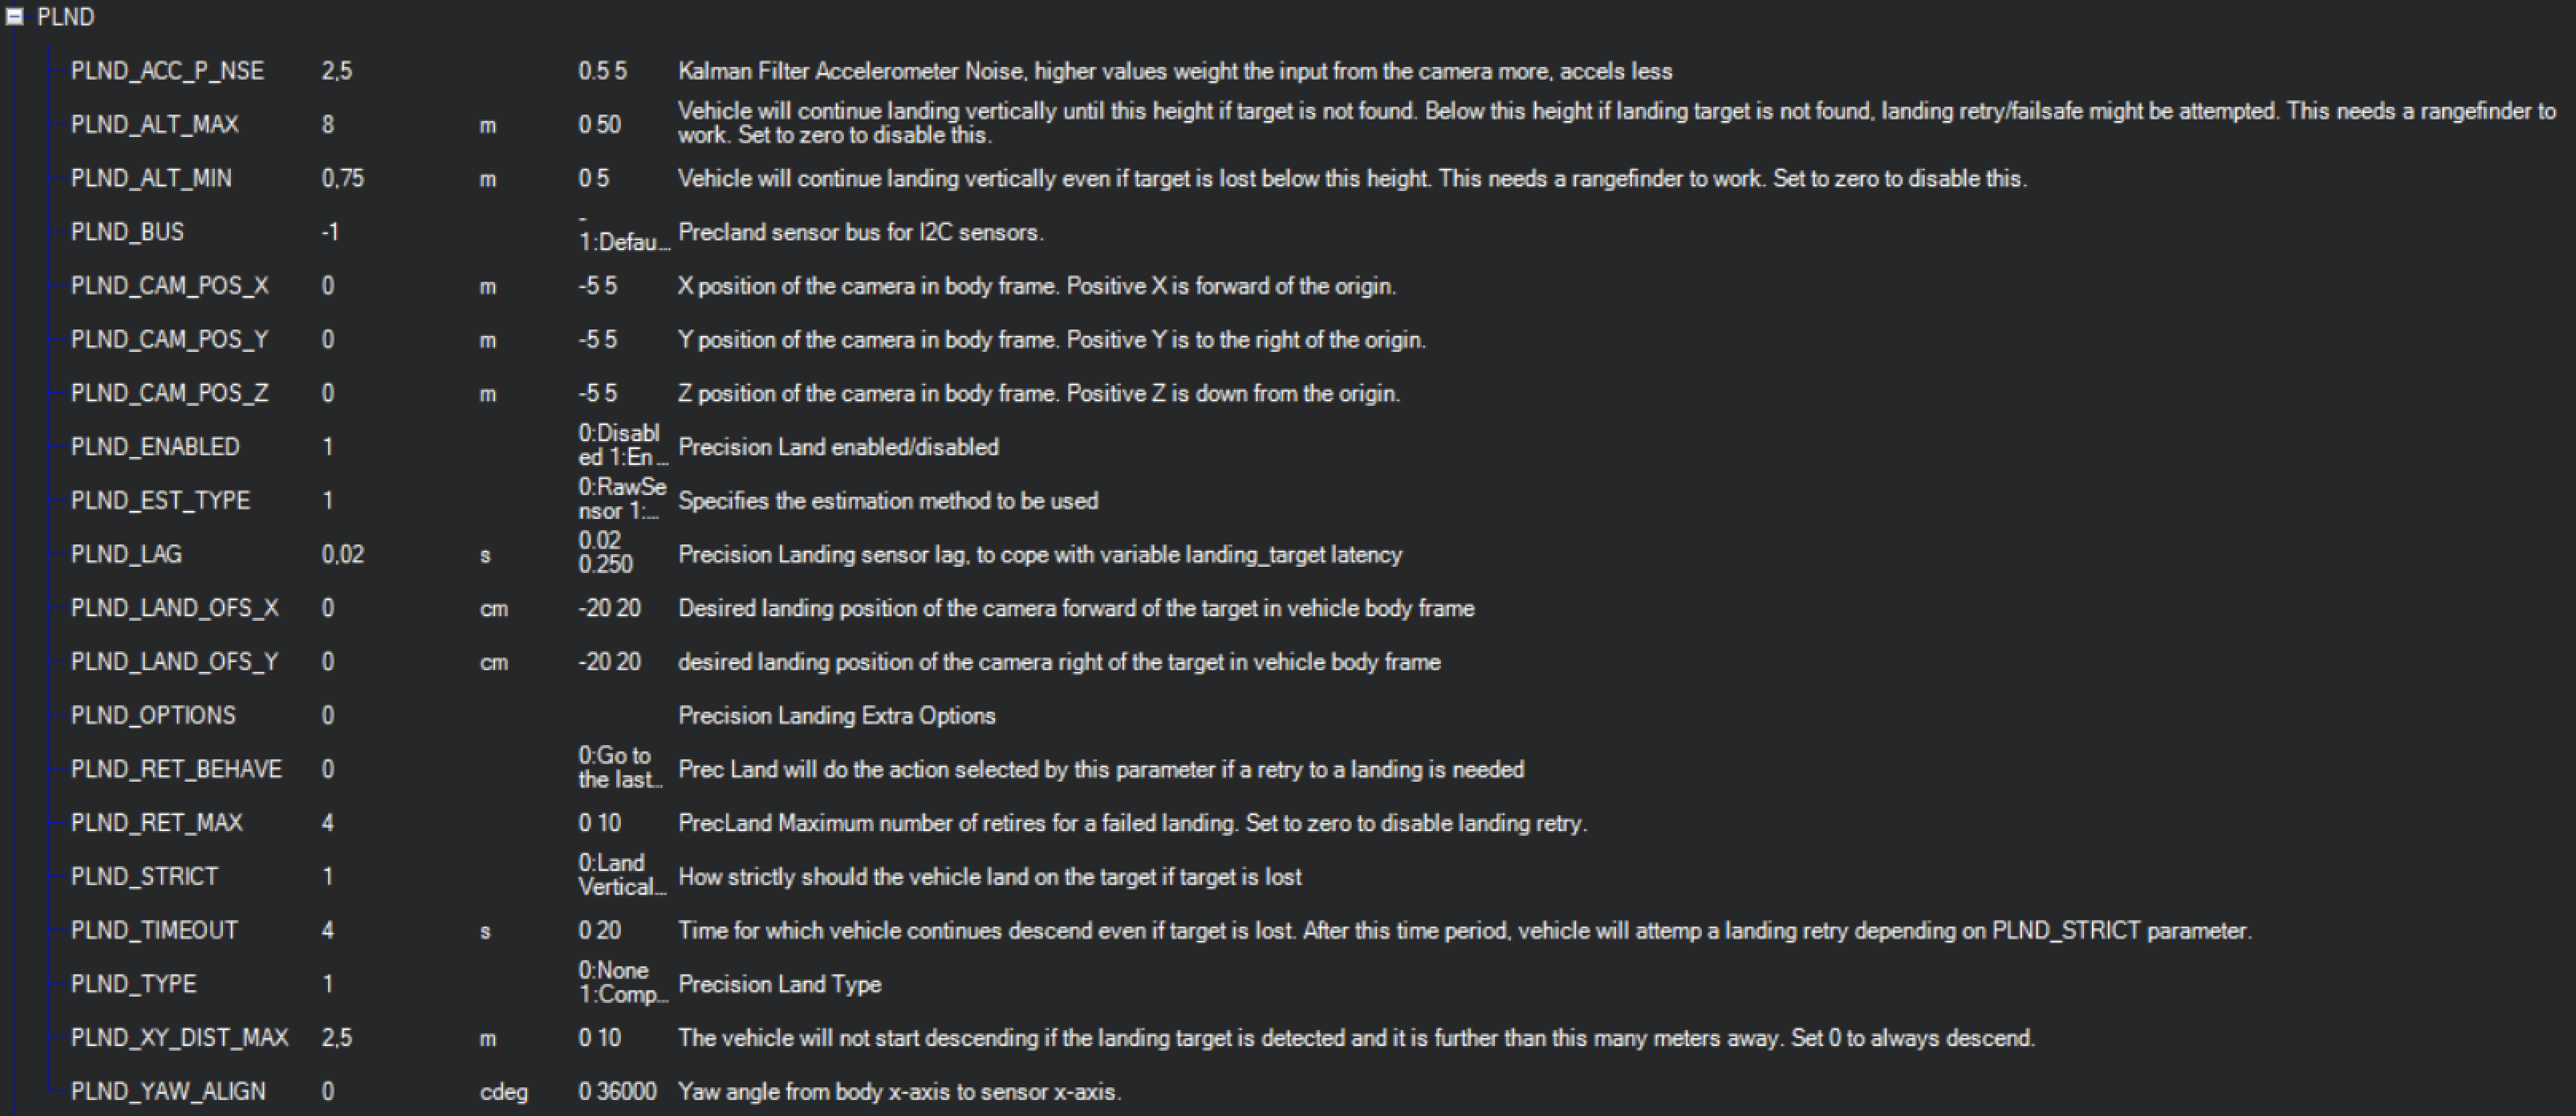
It is recommended to test several options of Kalman filter during the test flights (or switch it off) to achieve the best performance.
Set up serial communication in SERIALx Section.
| Param | Value | Comment |
|---|---|---|
| SERIAL2_BAUD | 230 | Select baud rate - it needs to be same as in receiver’s configuration. |
| SERIAL2_OPTIONS | 0 | Default |
| SERIAL2_PROTOCOL | 2 | MAVlink2 protocol support. |
Set up serial communication messages in SRx Section. Sensor requires some data from autopilot to work in different modes.
| Param | Value | Comment |
|---|---|---|
| SR2_EXTRA1 (or MAV2_EXTRA1) | 20 | Stream Attitude information (20Hz) (YAW Orientation is required for sensor in compass mode) |
| SR2_POSITION (or MAV2_POSITION) | 20 | Optional - Stream Vehicle position (20Hz) (LOCAL_POSITION_NED is required for sensor to provide LOCAL position for the target) |
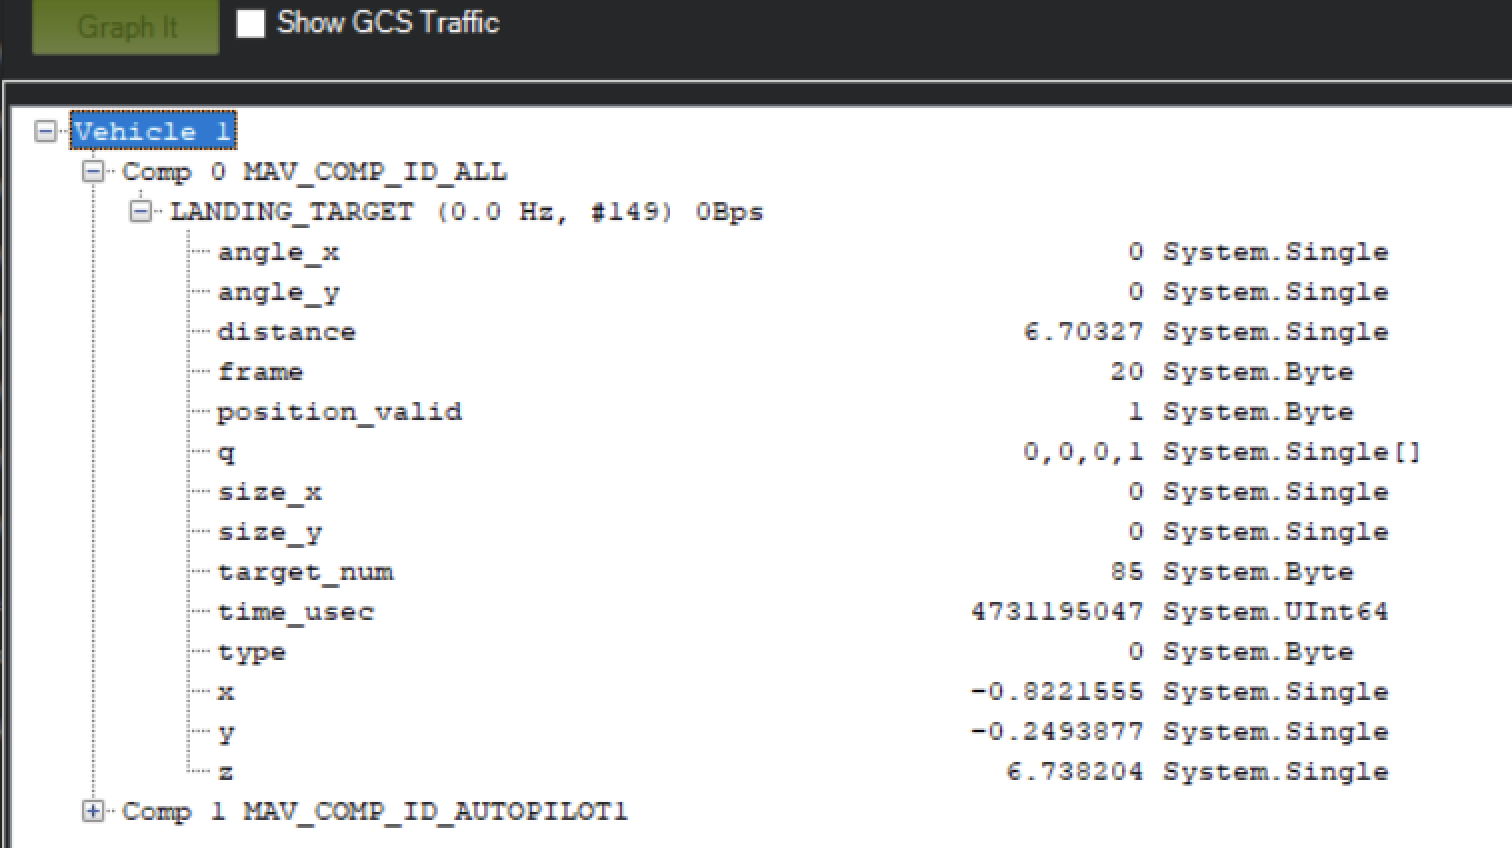
Check setup.
If all settings are done correct, autopilot has GPS data and receiver in the field of view of the transmitter, you can find LANDING_TARGET message in mavlink inspector (a screenshot from Mission Planner)
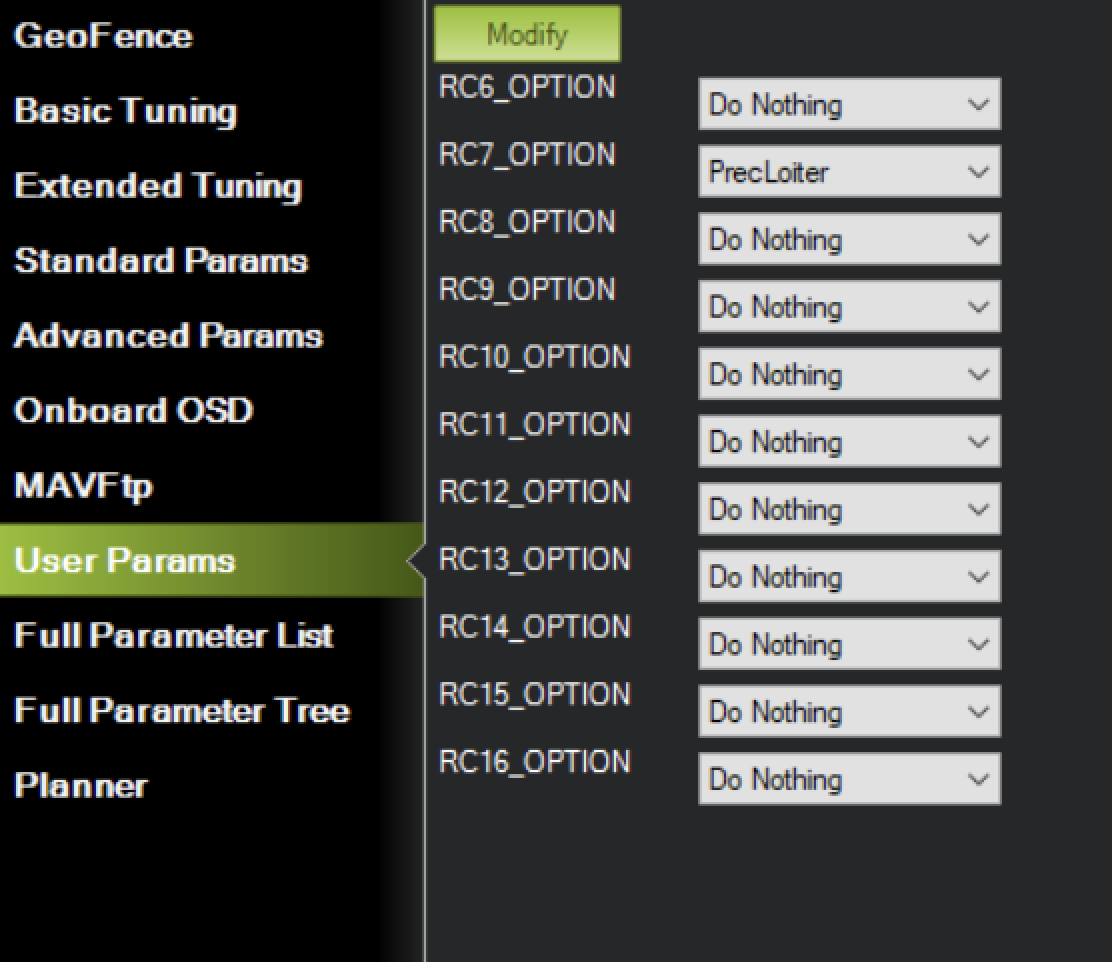
Setup Precision loiter mode.
To enable precision loiter mode you need attach any unused switch to PrecLoiter option see picture below:
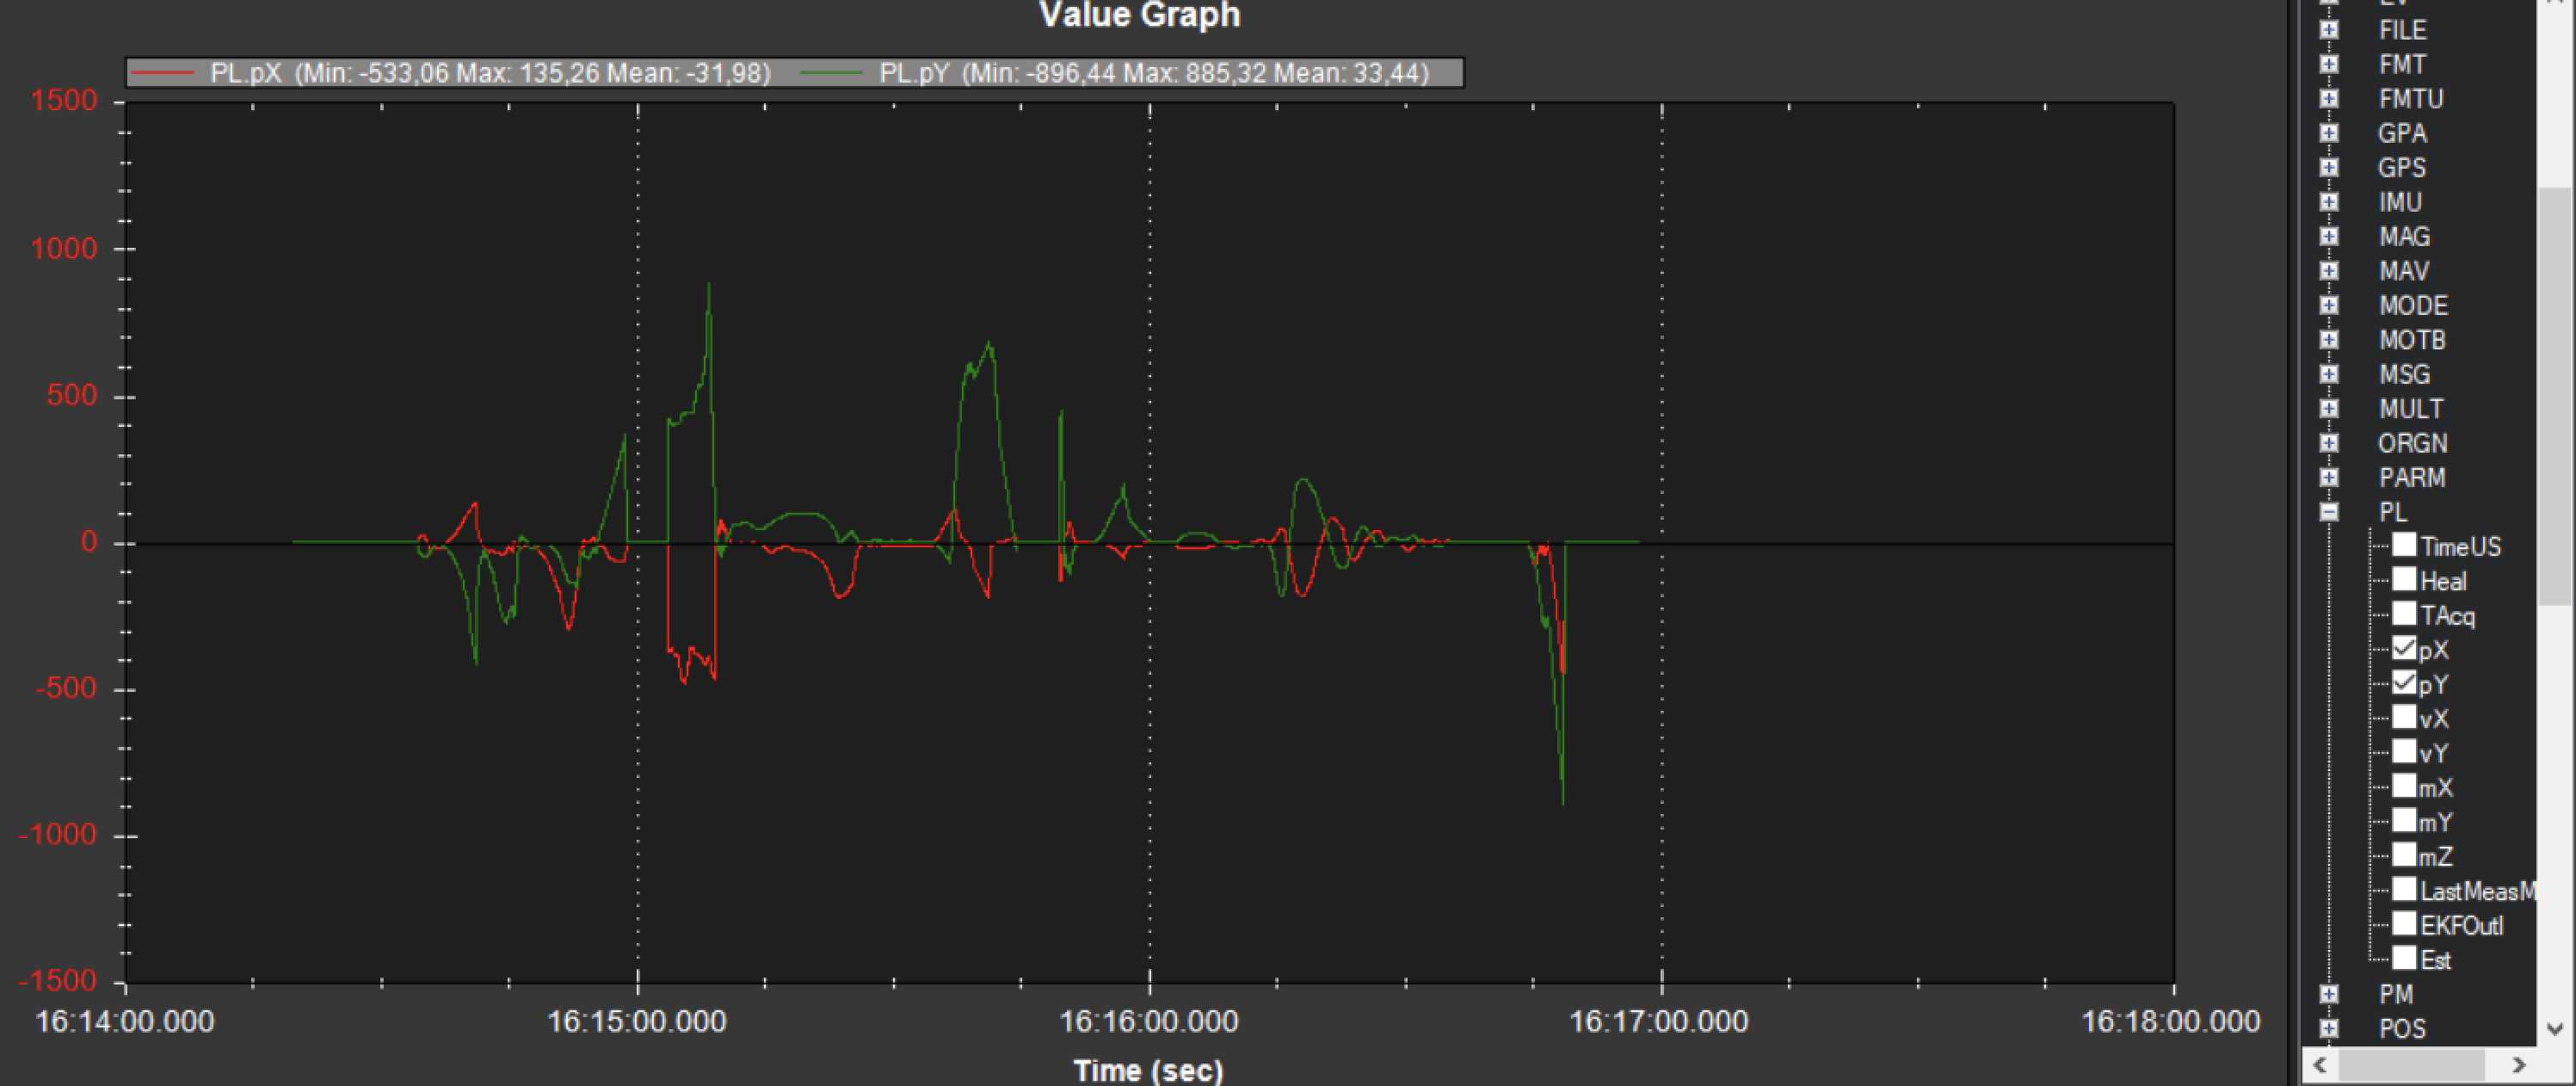
Try to use this switch and you must get messages: “PrecLoiter: LOW” and “PrecLoiter: HIGH” After test flight above target check telemetry - you will find PL data contains offsets form landing target.
PID tuning
In case of oscillations and other issues at landing stage, pls, check PID parameters of Ardupilot.
It is recommended to check the Position XY, Velocity XY and Loiter speed parameters in “Extended tuning” section to achieve the best performance.
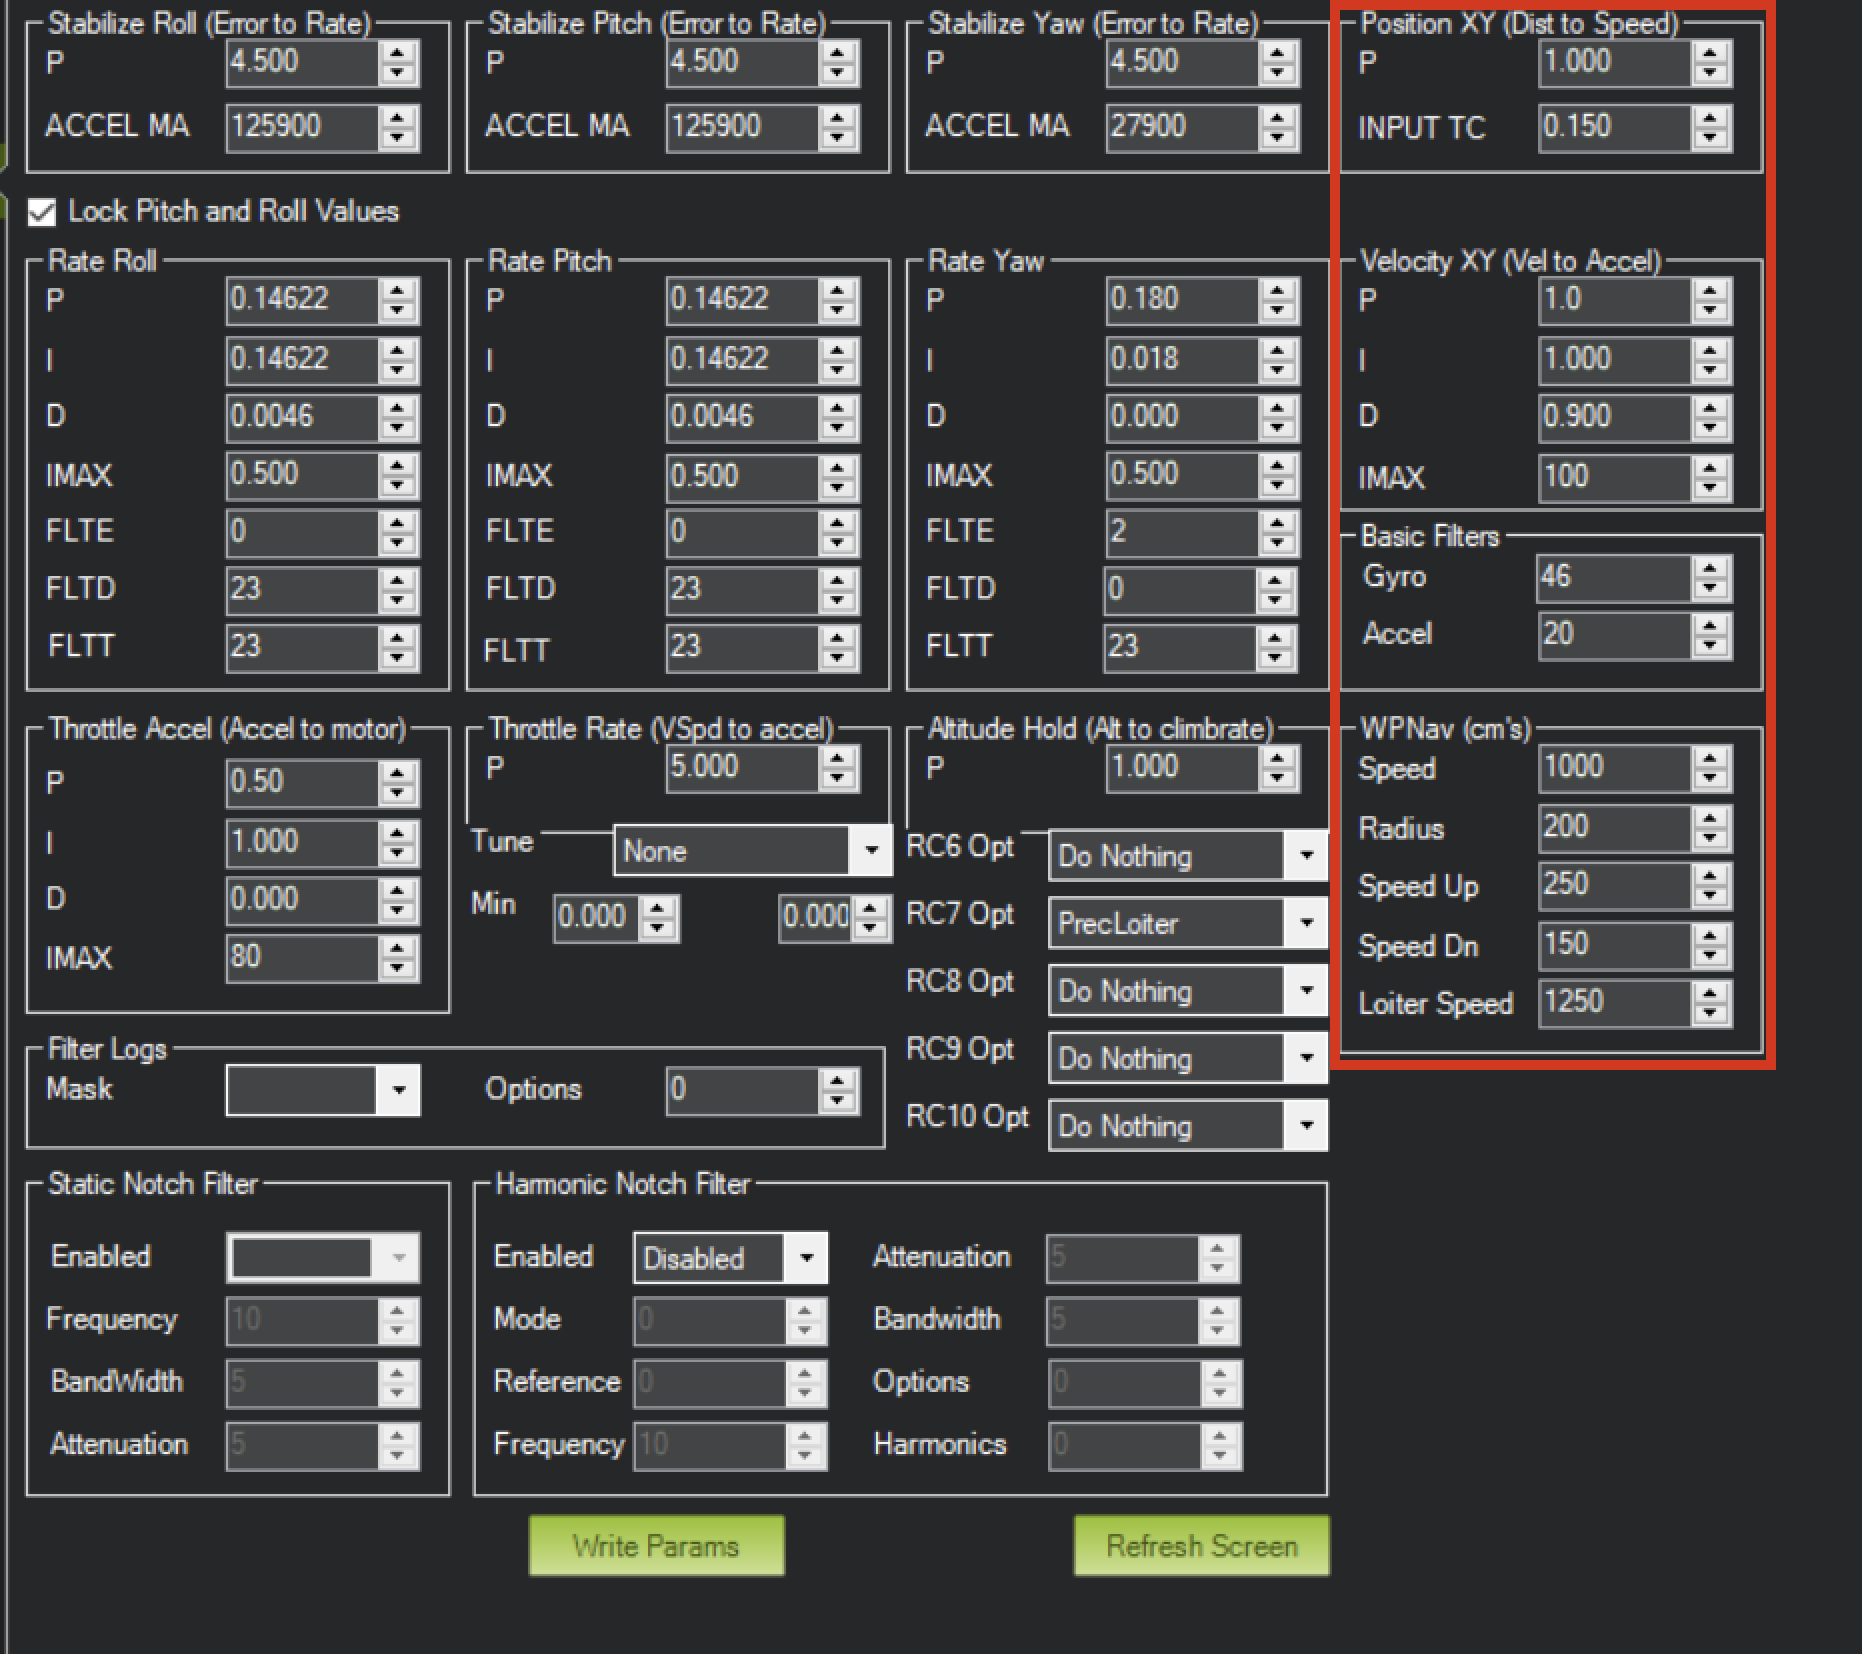
For example, settings Velocity XY P = 0.8, I = 0.2, and D = 0.6 works well for some of our customers
It recommended to start testing PIDs and precision system performance in “Precision Loiter” mode. I use some algorithms and settings in precision landing.
For additional information, see Ardupilot manual.
Troubleshooting
Before of all check:
- You are using lates version od ULS-Tools, lates firmware on USL-XCOPTER transmitter and receiver, and latest Ardupilot firmware.
- Check common Troubleshooting section
No mavlink message
- ULS-XCopter transmitter are switched on and receiver in field of view of transmitter.
- Red light on receiver flashes fast ( > 5 times per second ). If it flash 2 times per sec it mean that transmitter not switched on, or not in field of view. If it not flash - check power.
- Check Serial setting on AP params and on receiver be sure you are set EXTRA params for corresponding serial port on AP.
- Check wiring power and RX, TX (see pinouts and wiring diagram)
- Check on receiver that MAV_FRAME_BODY_FRD enabled.
Not holding in precision loiter mode but mavlink message ok
- check that you setup Precision loiter mode on AP
Feedback
Was this page helpful?
Glad to hear it! Please tell us how we can improve this page !
Sorry to hear that. Please tell us how we can improve it !